Table of Contents
Step 1. Bake your simulations
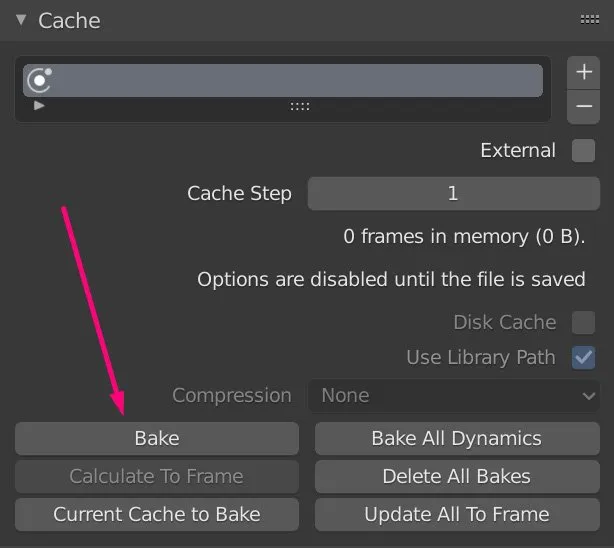
In Blender, there are multiple types of simulations. Make sure, that you bake every single one of them, which saves the simulation even if you open and close the project. This is not only a time-saver because you don’t have to run the simulation process again. It also doesn’t create the same result every time which would mean, that if you want to pause rendering and start it again it would create a glitch in the simulation.
To achieve this you just have to click on the Bake Button in each Cache Menu.
Step 2. Activate the Denoiser
In Blender Version, 2.81 Blender got the first AI Denoiser which really delivers remarkable results. You can read more about it in this article.

Since Version 2.82 There is another AI Denoiser by Nvidia which was developed for real-time Ray-Tracing on Nvidia’s RTX GPUs. But even if it is now possible, to use it without an RTX GPU it is much slower than using the IOID in the Compositor which means if you don’t own an RTX GPU you should do it how I described it here.
If you use a Denoiser you can use fewer samples because you don’t have to worry about noise. Which can lower your Export times dramatically.
Step 3. Check everything
Watch if everything you want to render is enabled in the Outline Tab, check if the resolutions you set are correct, and make a Test render, to make sure, you don’t forget anything.
Step 4. set your Output settings
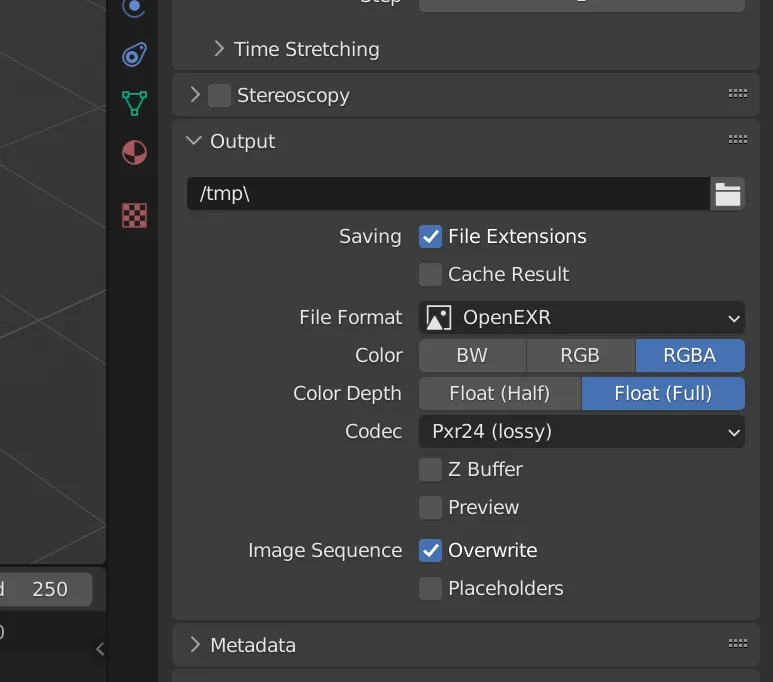
Select the folder in which you want to save the Images to.
The standard Image format for VFX Image sequences is OpenEXR. The reason is, that this format supports 32 Bit depth and a lot of multiple channels which can be useful for compositing, but that’s another topic.
In Color, you should pick RGBA. That includes the Alpha Channel if you have transparent parts in your Image.
When it comes to color depth, you can choose between float (half) (16bit) or float (full) (32bit). The difference is 32bit Images contain more information which enables you, to do more in post-processing. The downside is, that the files are roughly 2 times bigger. For most of the project, 16bit will be more than enough.
As in every Image format there are also algorithms, to compress the Image and make it smaller while maintaining as much quality as possible, probably the best for CG is Pxr24 (lossy). Which was developed by Pixar specifically for CGI.
Step 5. Start the rendering process
Before you star rendering don’t forget to save, because starting the rendering process is one of the moments in which it is possible, that Blender crashes. You can start the rendering process either by clicking on Render Animation which you can find under Render or by pressing CTRL + F12 on Windows.

Step 6. Import the Image sequence in After Effects
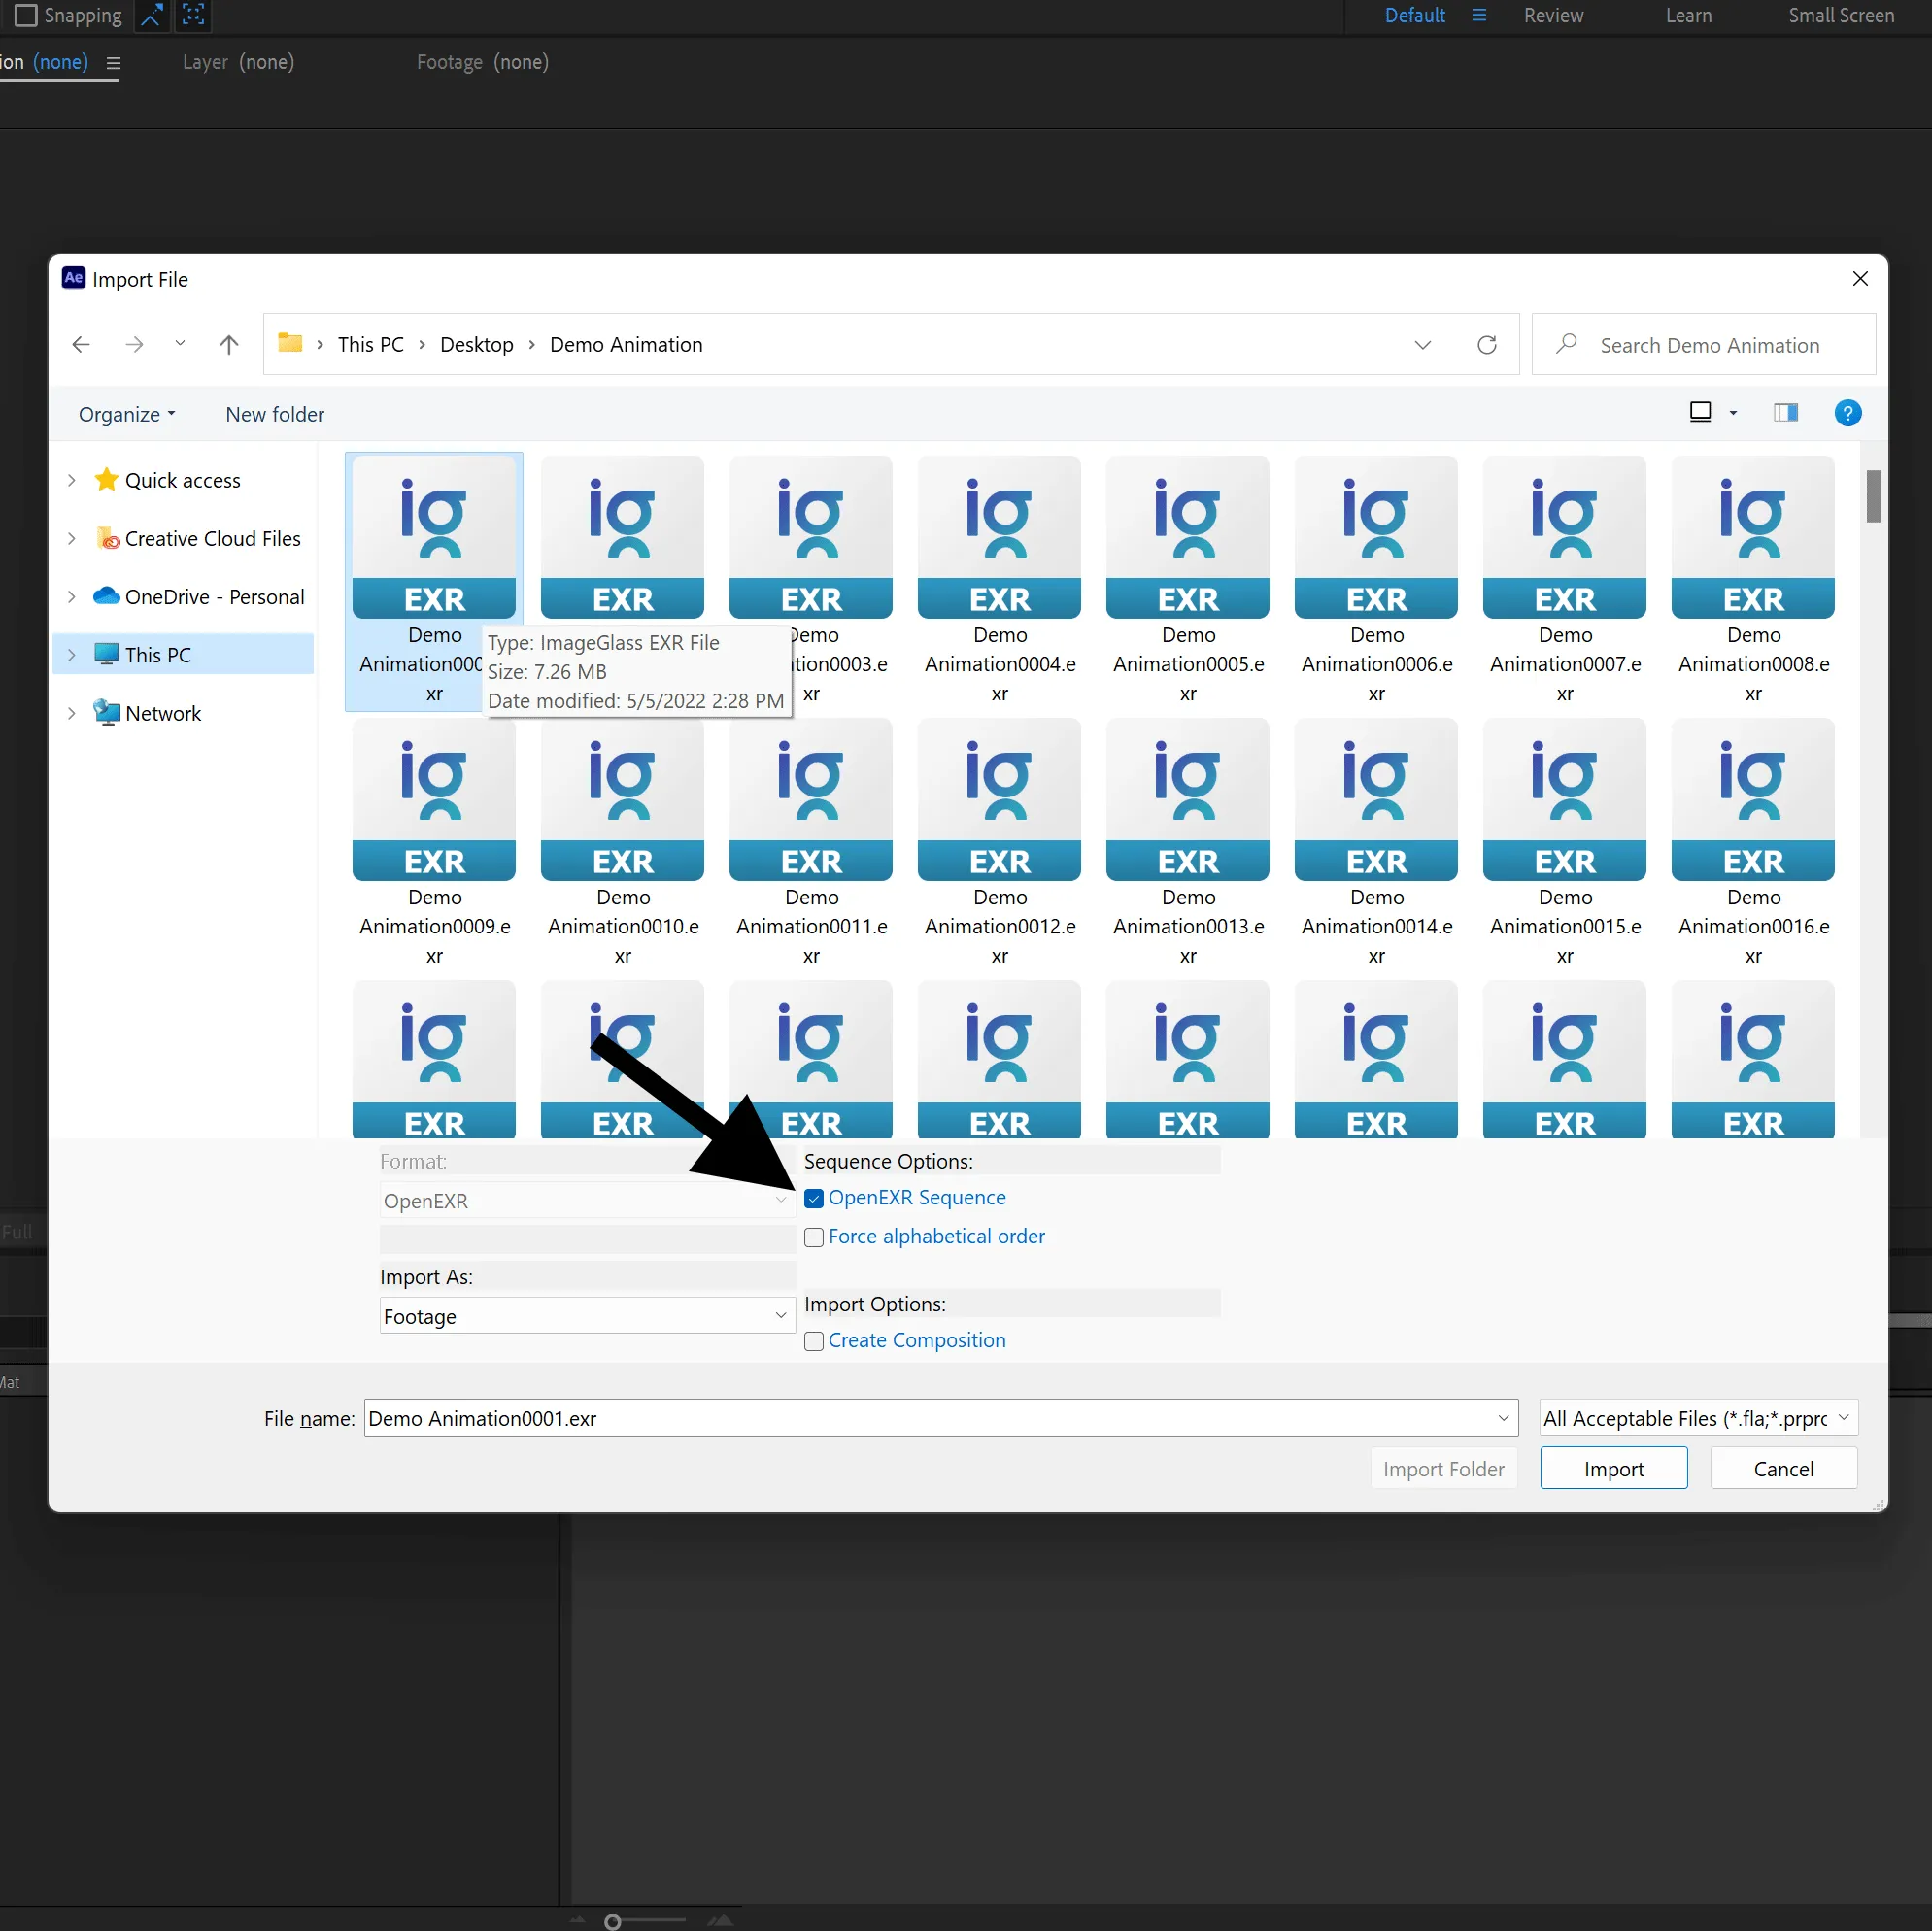
After creating a new project in After Effects, click on File>Import>File… or press CTRL + I.

Then select the first image of your Animation and clic on Import. Make sure, to check the Box OpenEXR Sequence so that After Effects imports everything as a video Sequence.
Step 7. Interpret the Footage
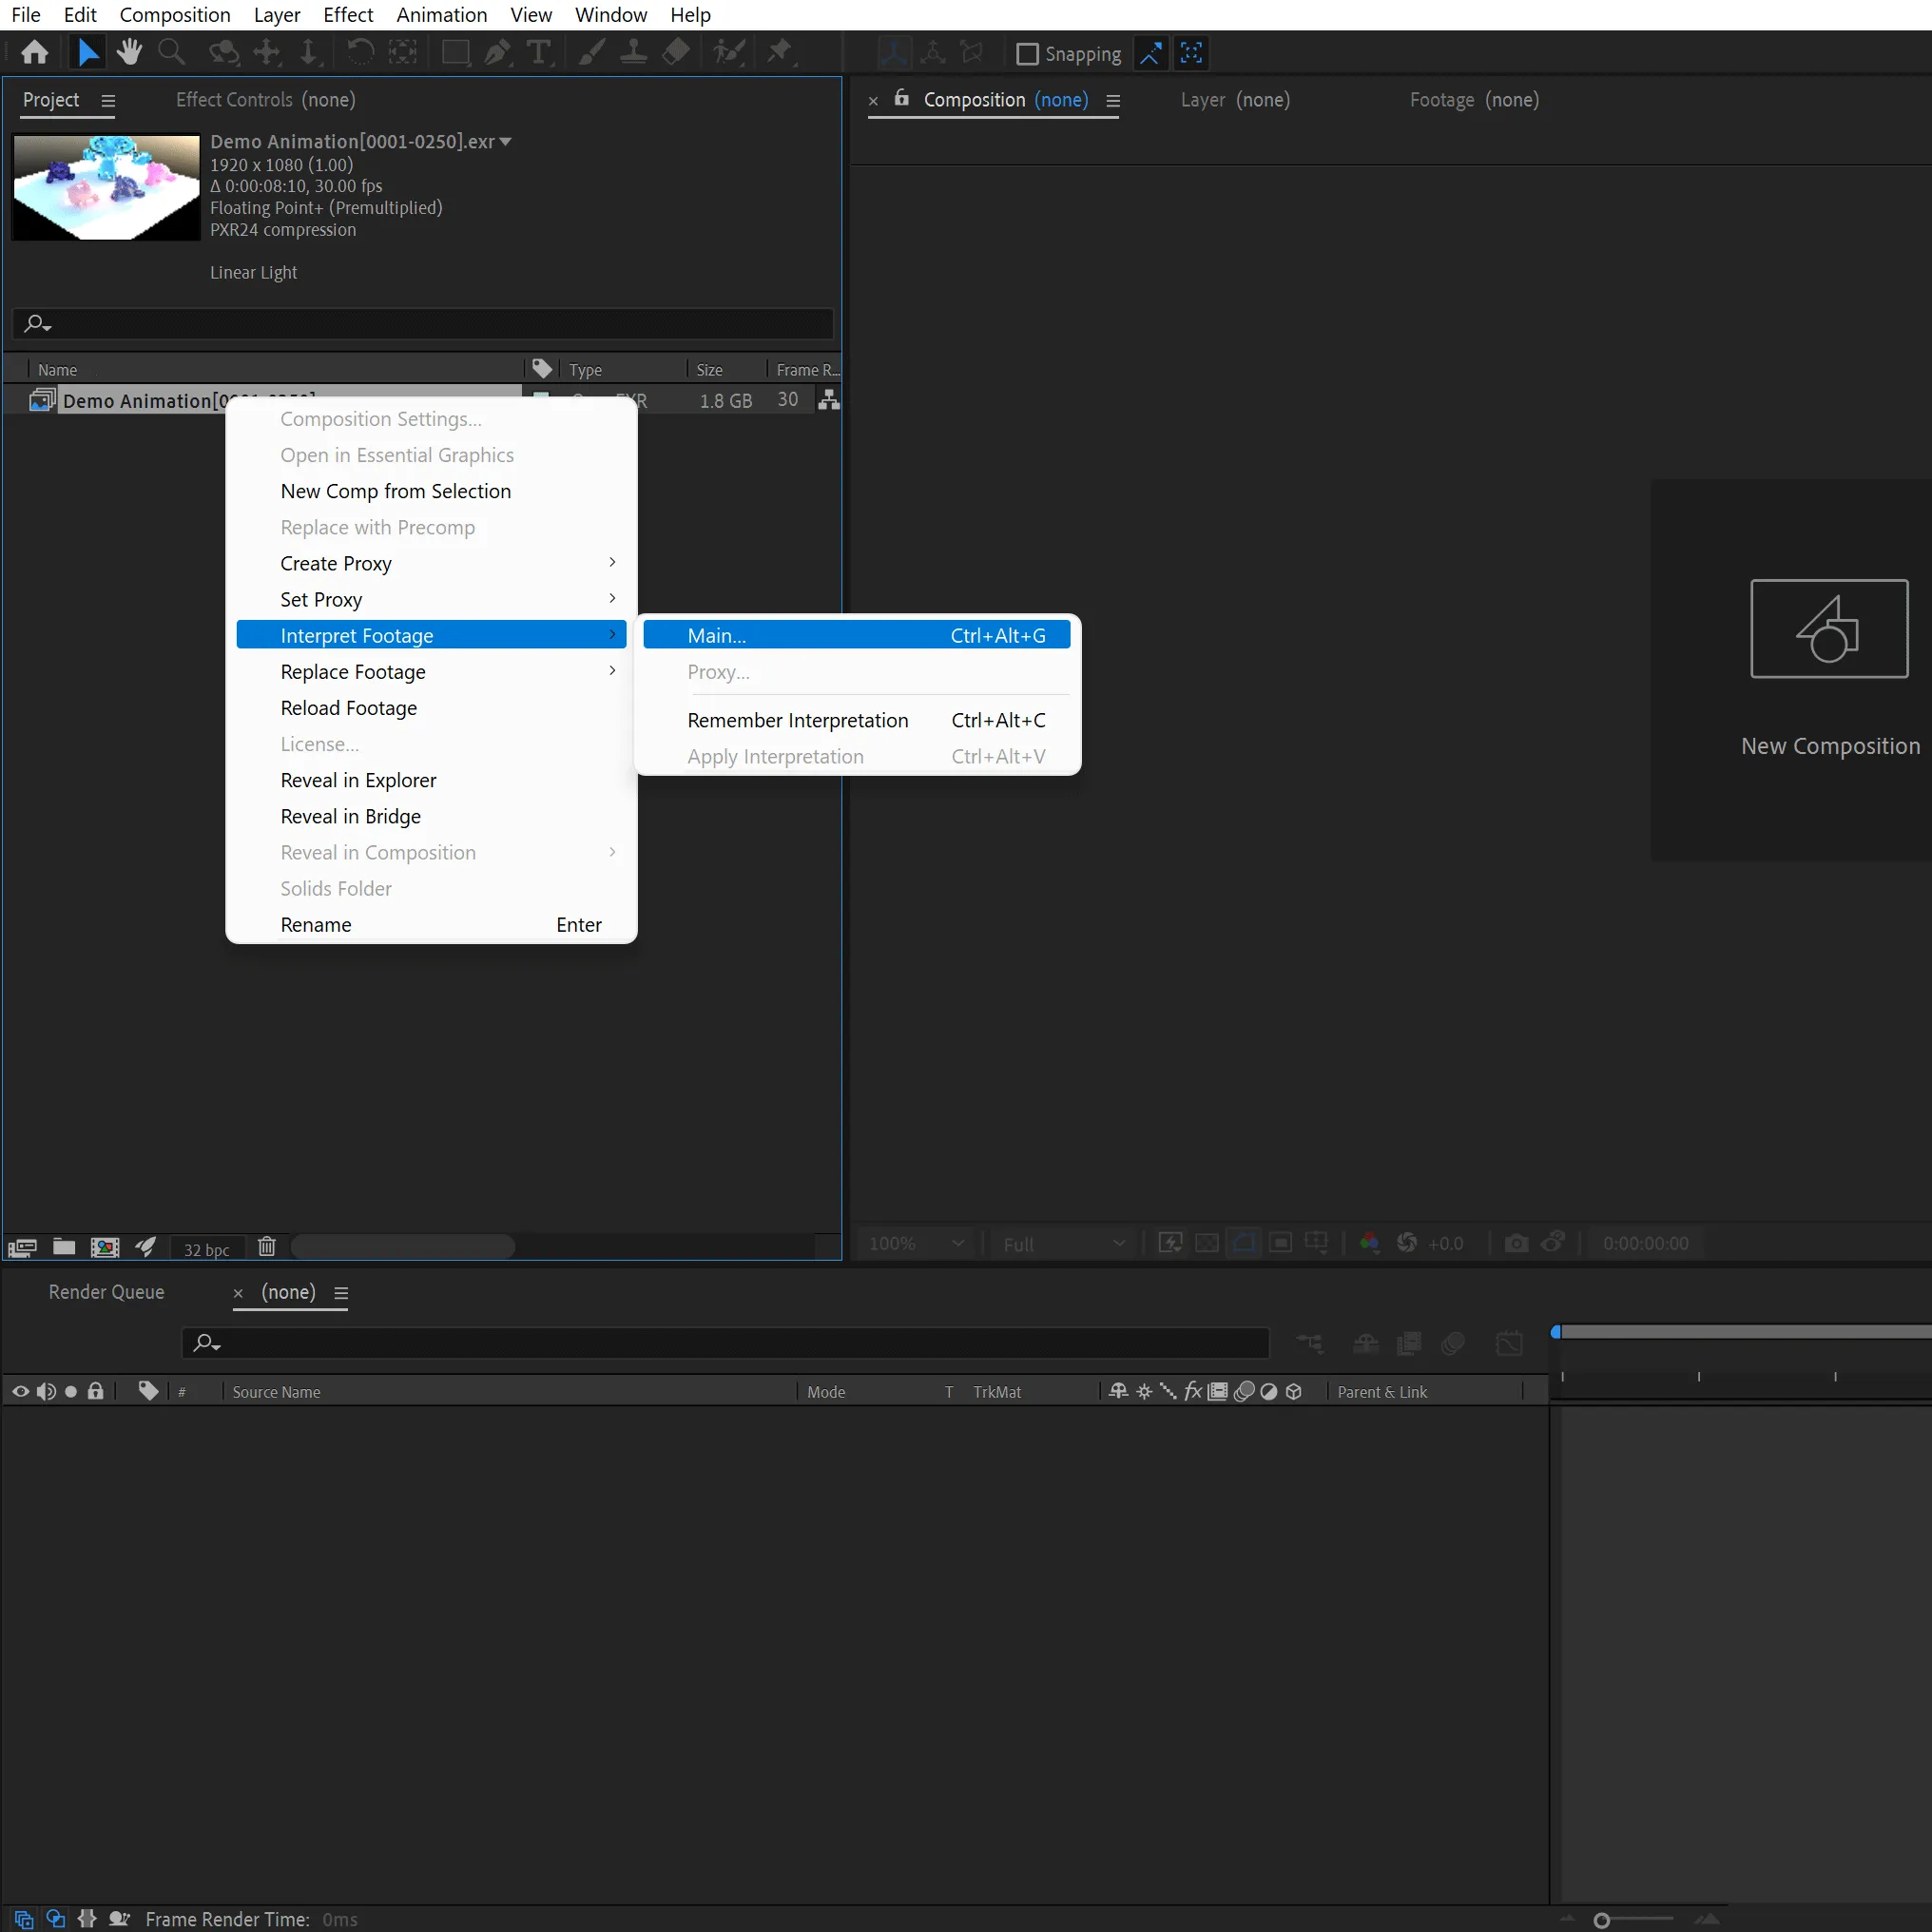
To interpret the Footage, right-click on the Footage and click on Interpret Footage > Main….
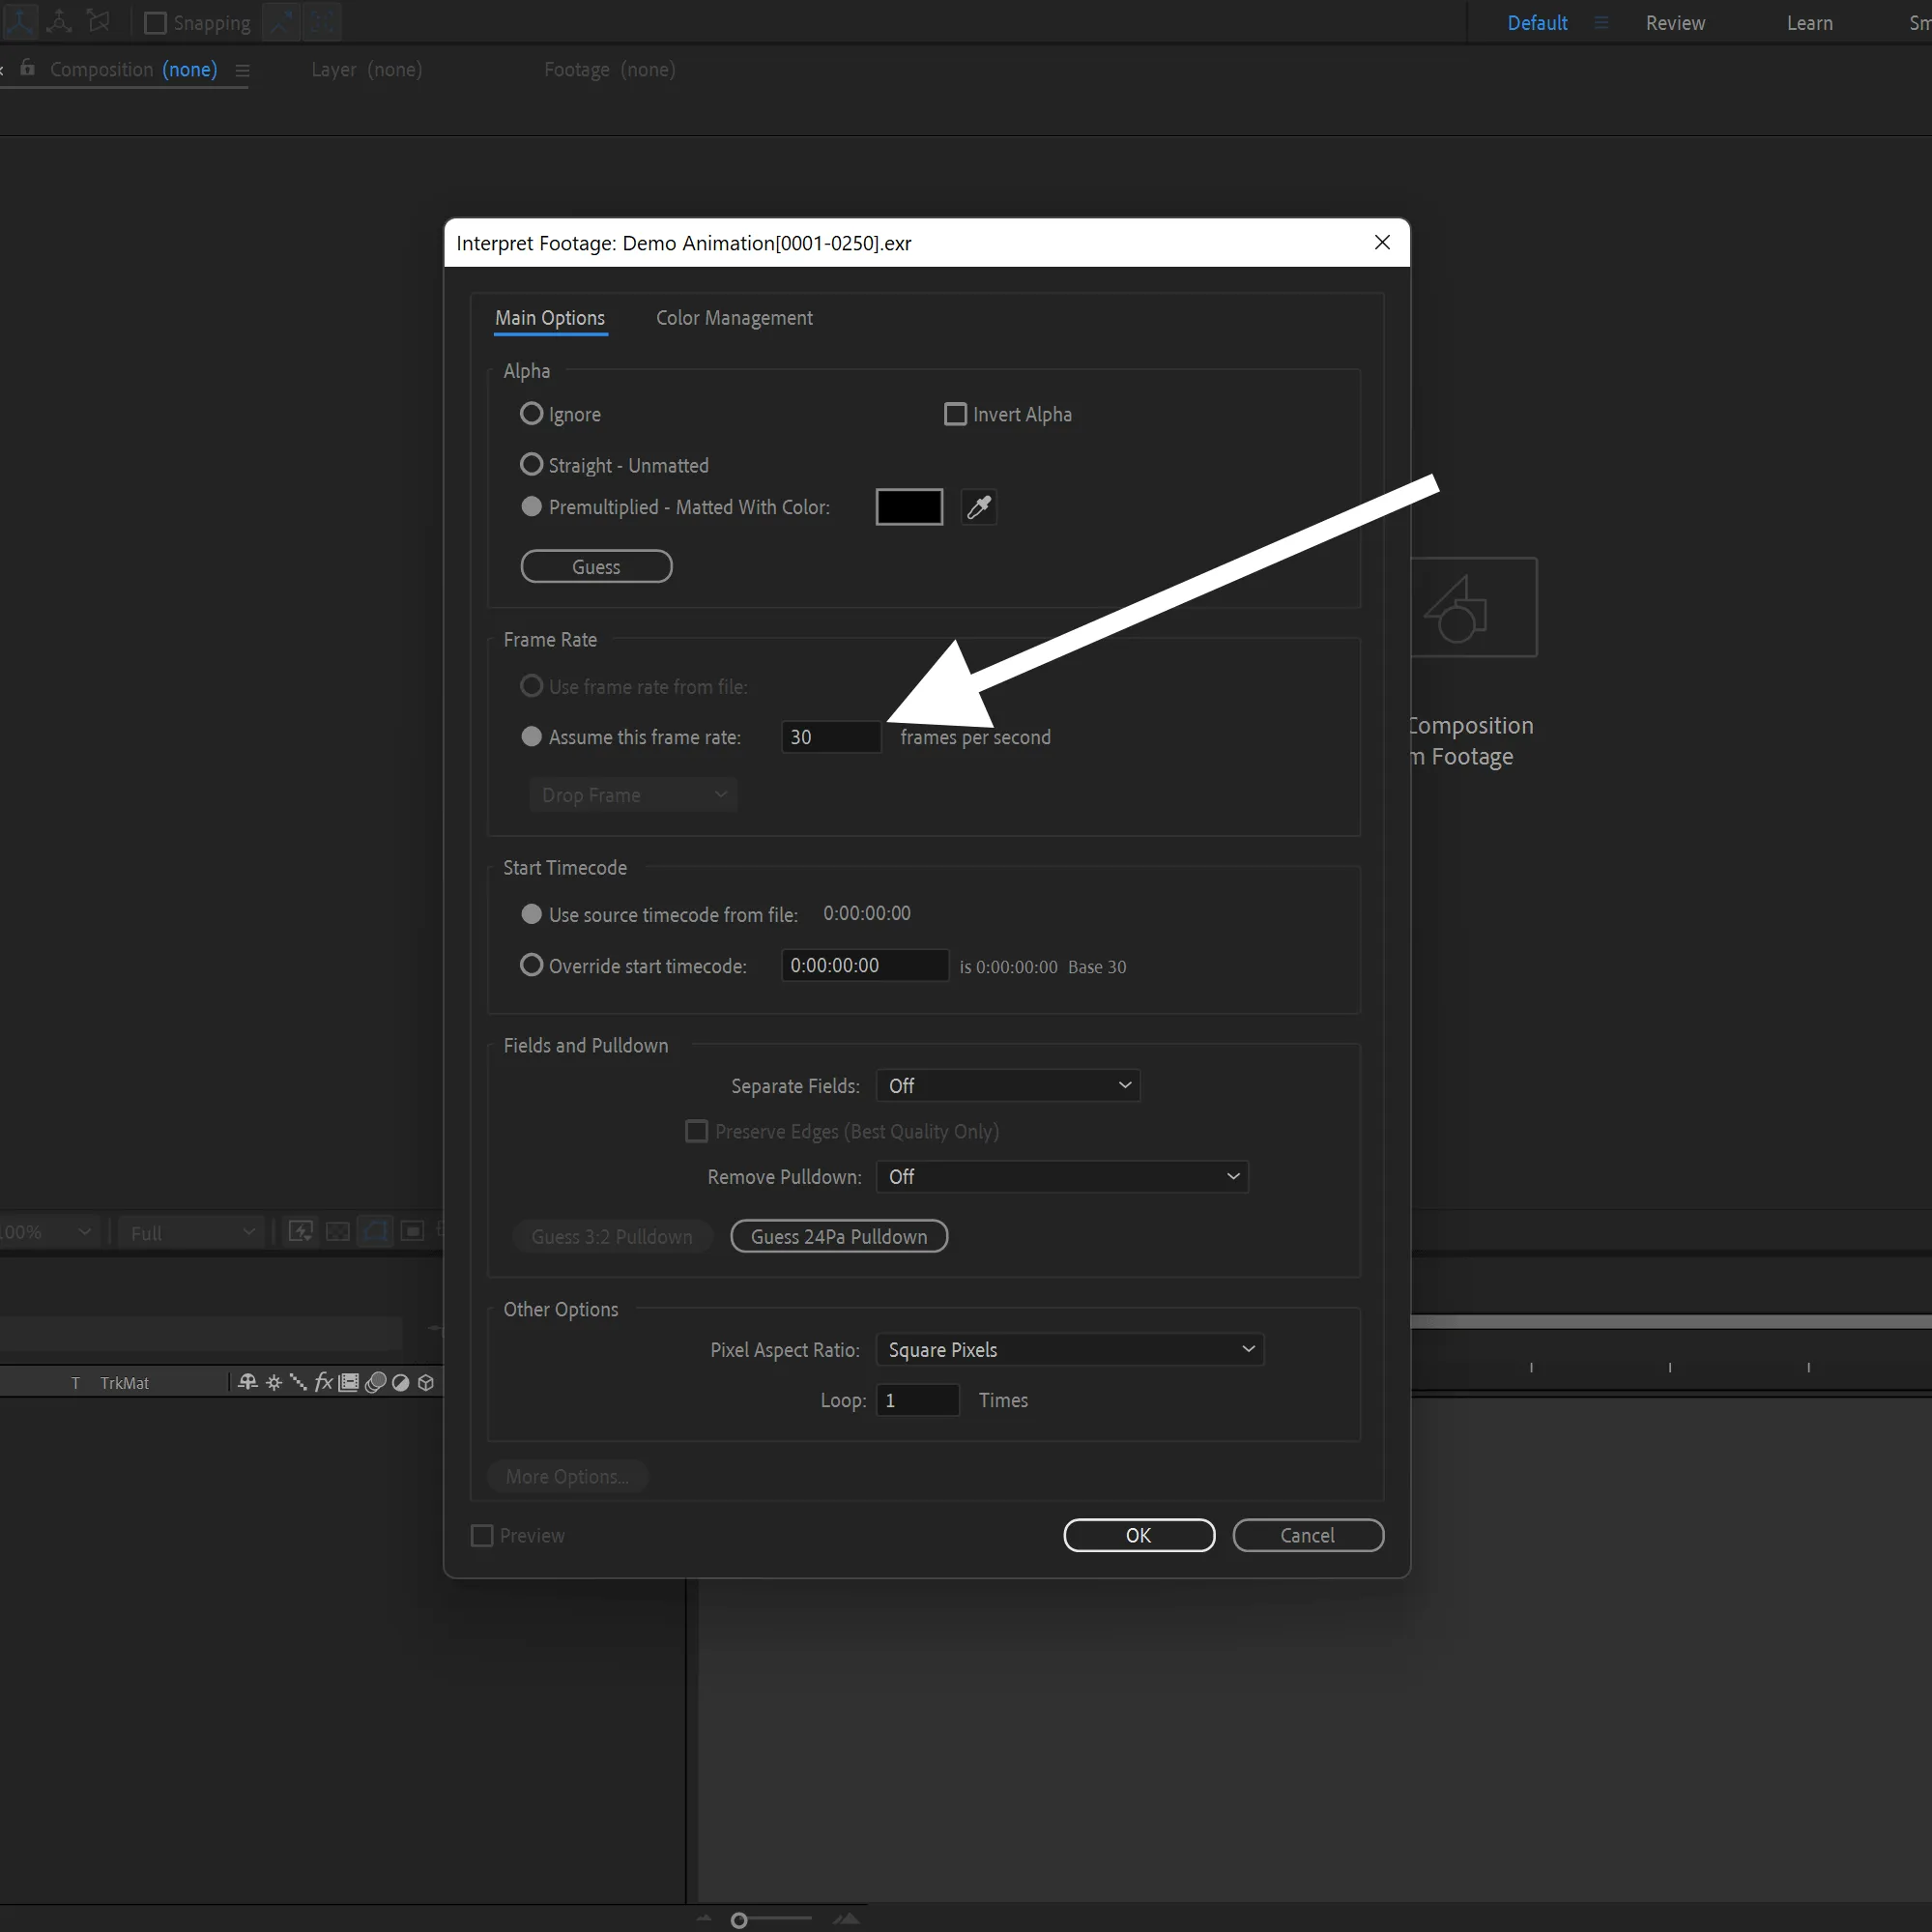
In this Menu you can see, how After Effects interprets the Footage.
The only thing that is important to change under Main Options is the Frame rate, which needs to match the one of the animation in Blender.
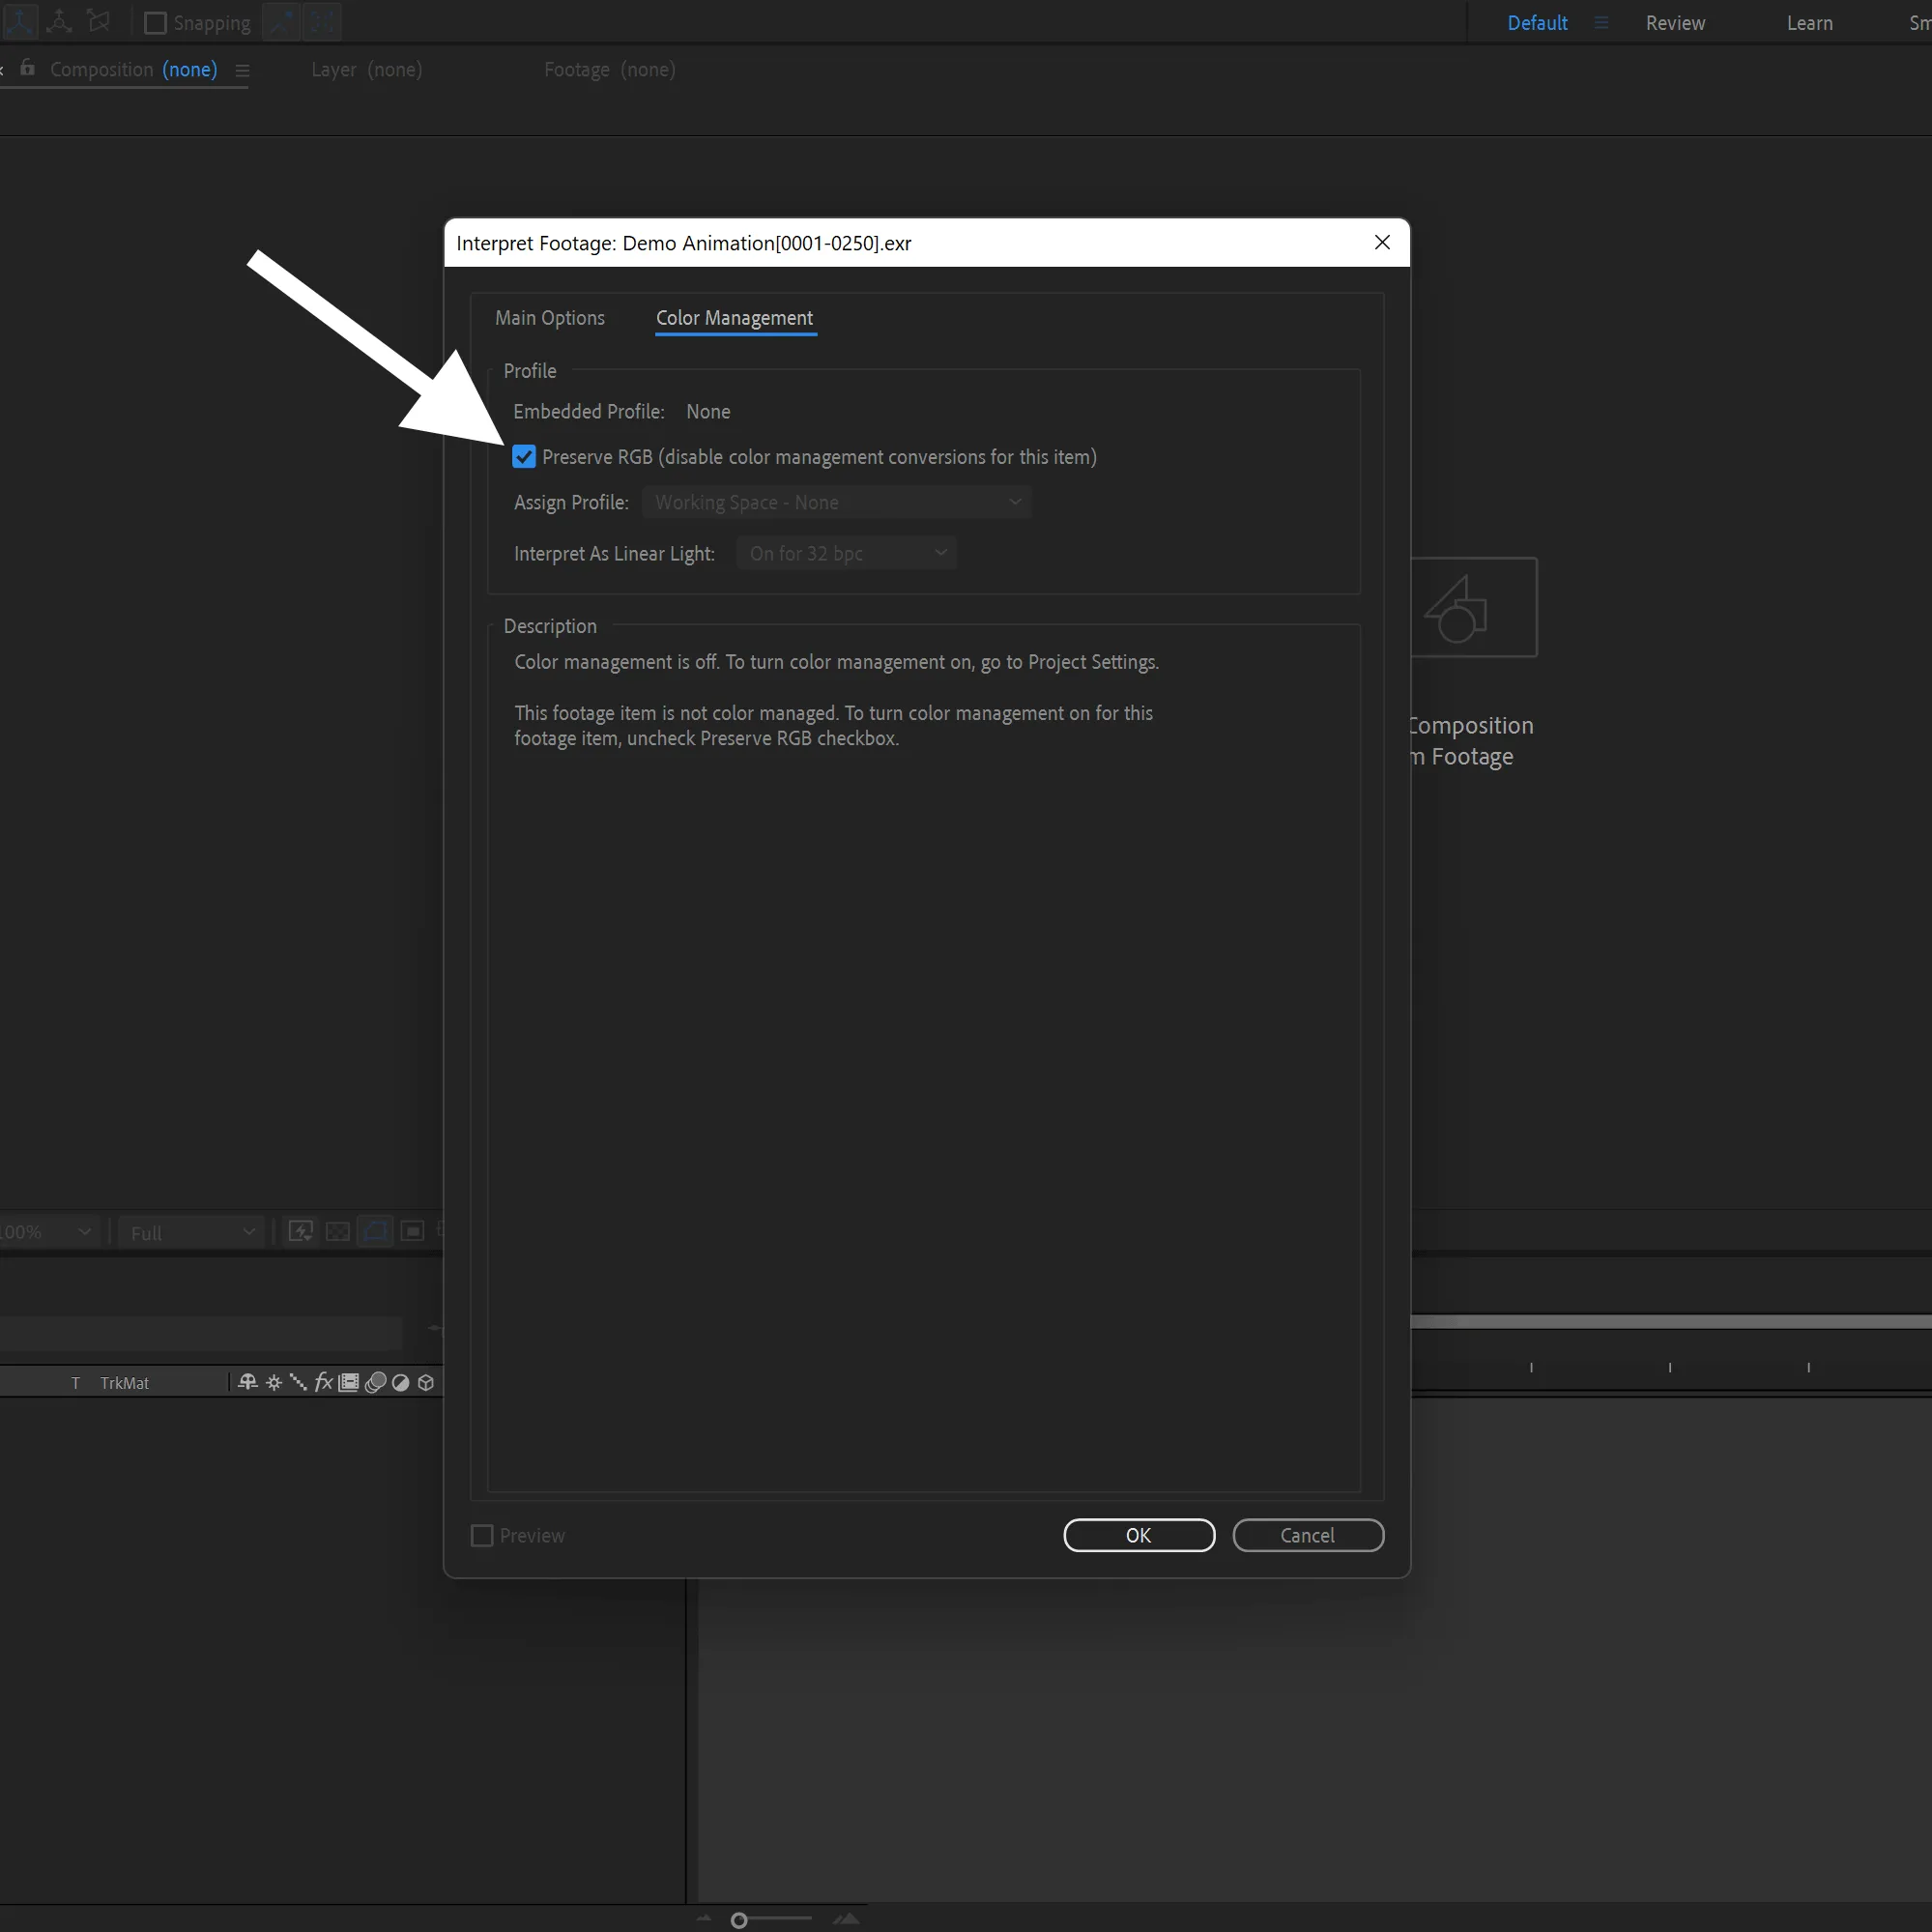
Under Color Management, you have to check Preserve RGB. (Only if you are using the Linear Images like OpenEXR.) After that, Click on OK.
Step 8. Add to timeline
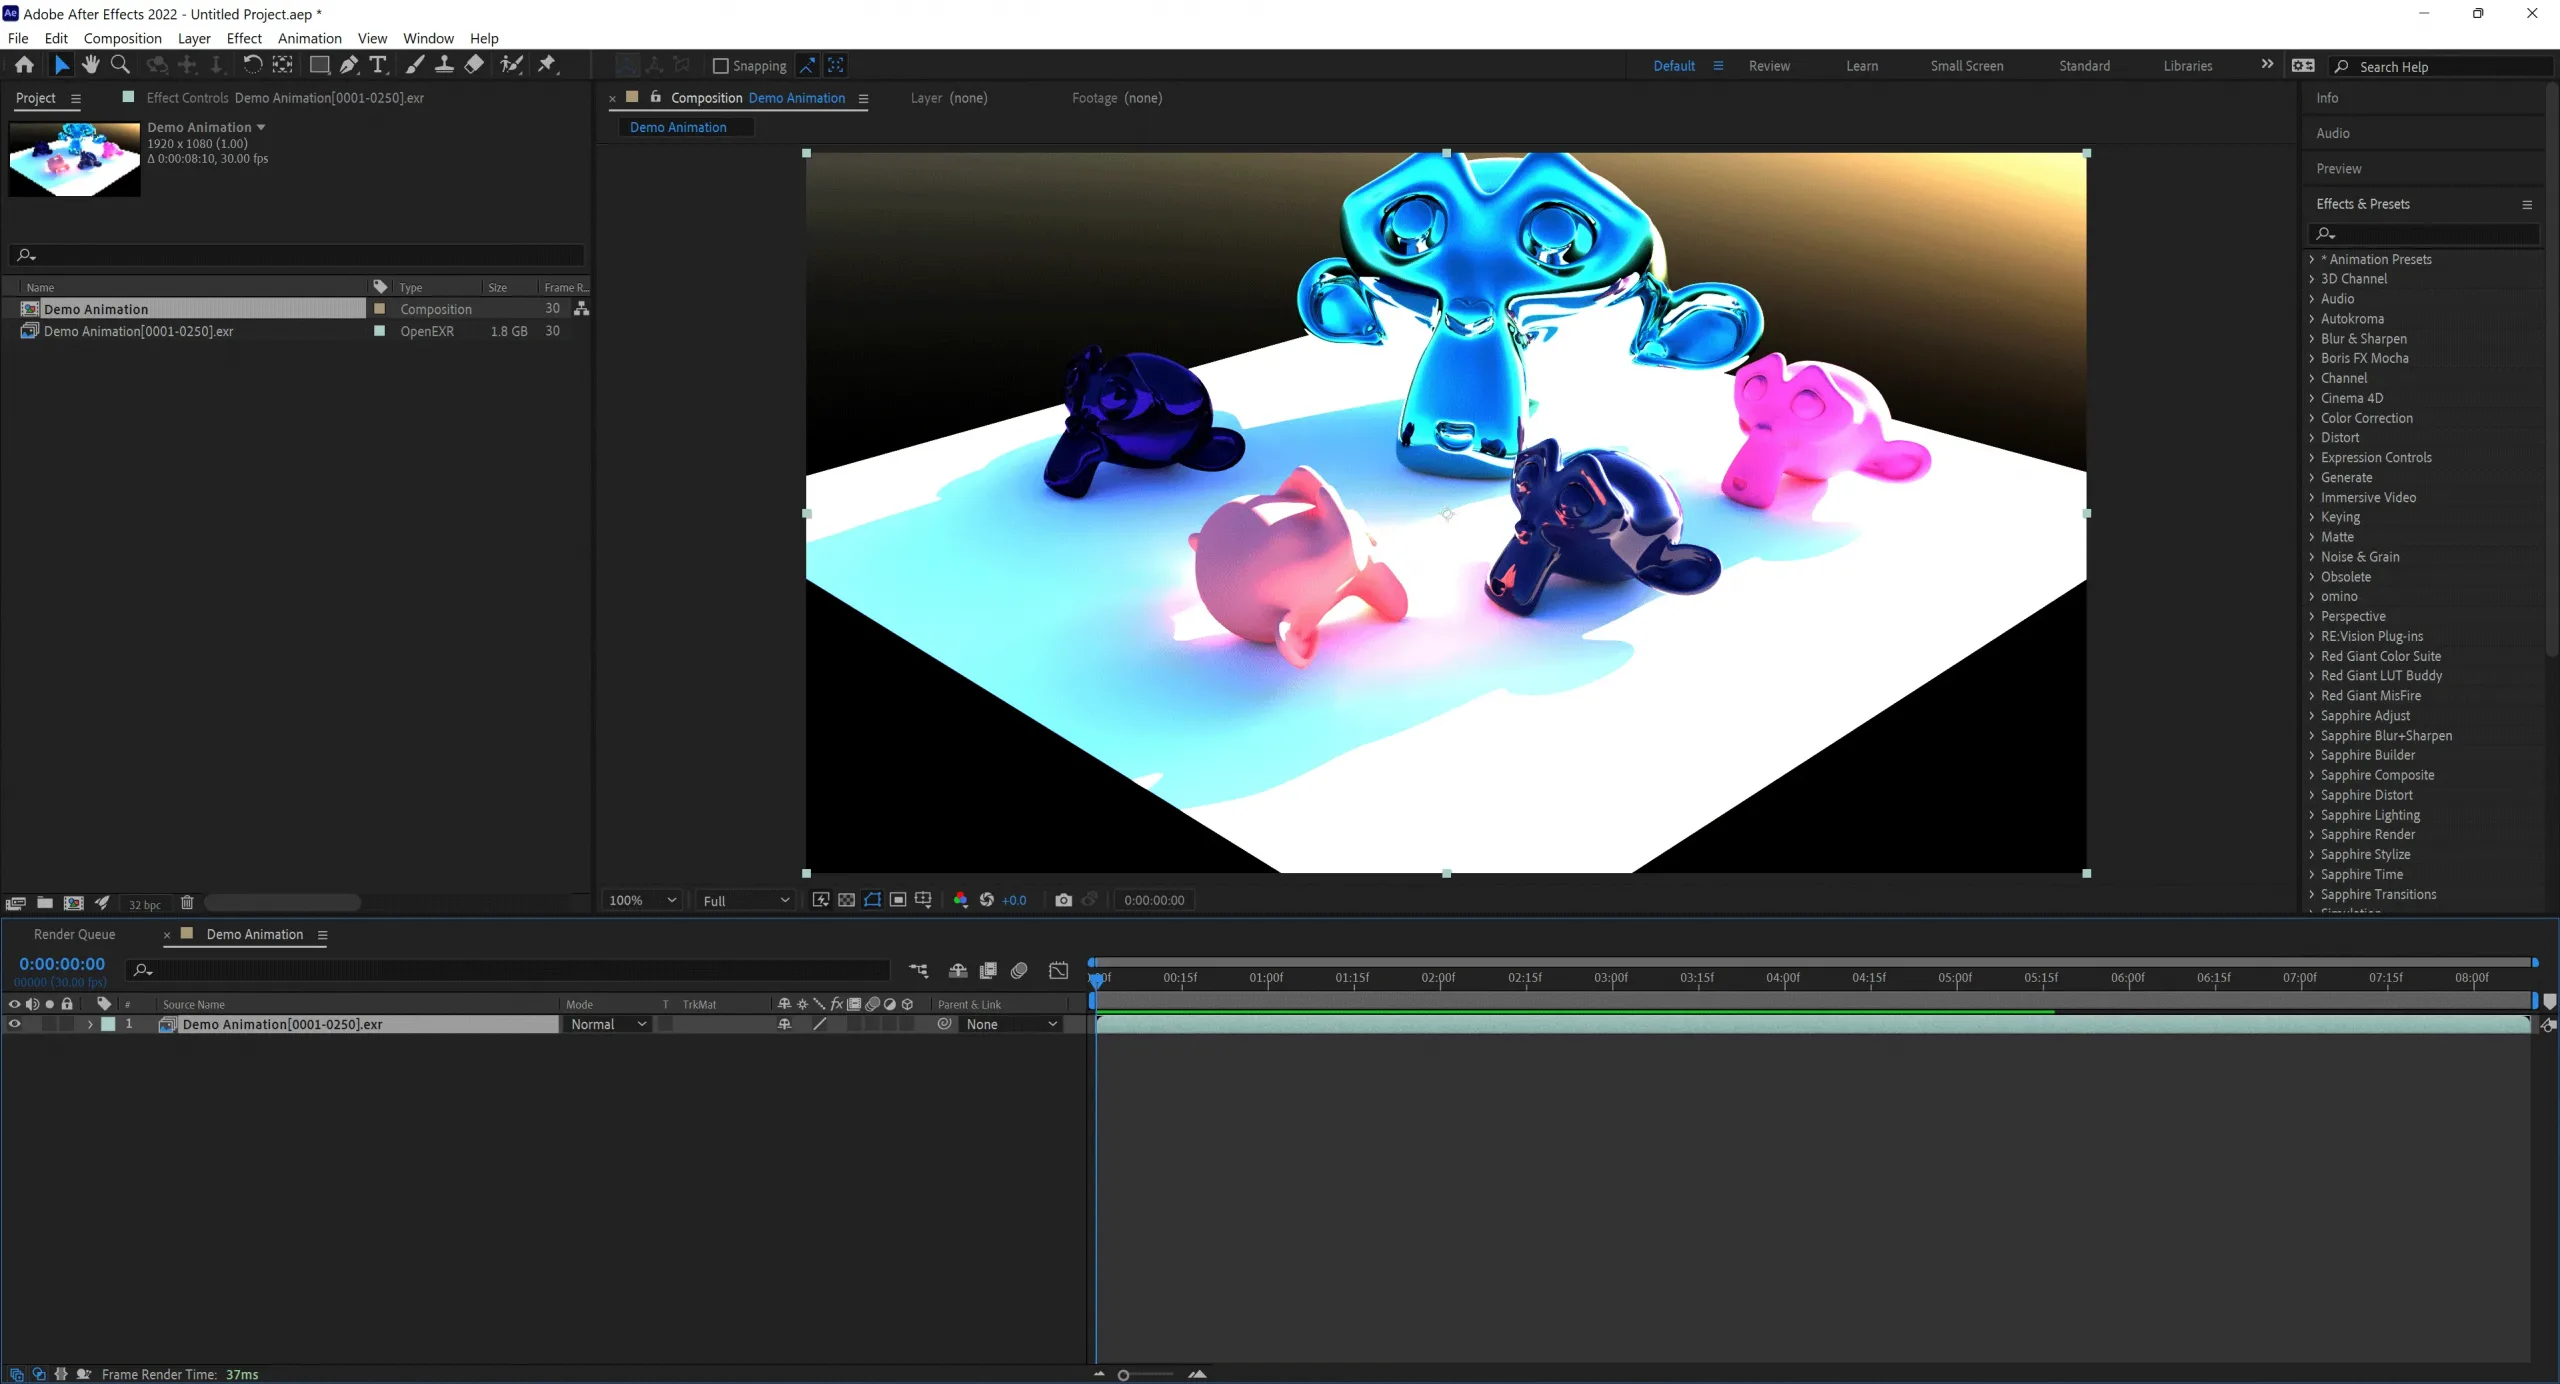
Drag the Footage on the Timeline, this will automatically create a Timeline with the right length, resolution and frame rate.
Step 9. OpenColorIO
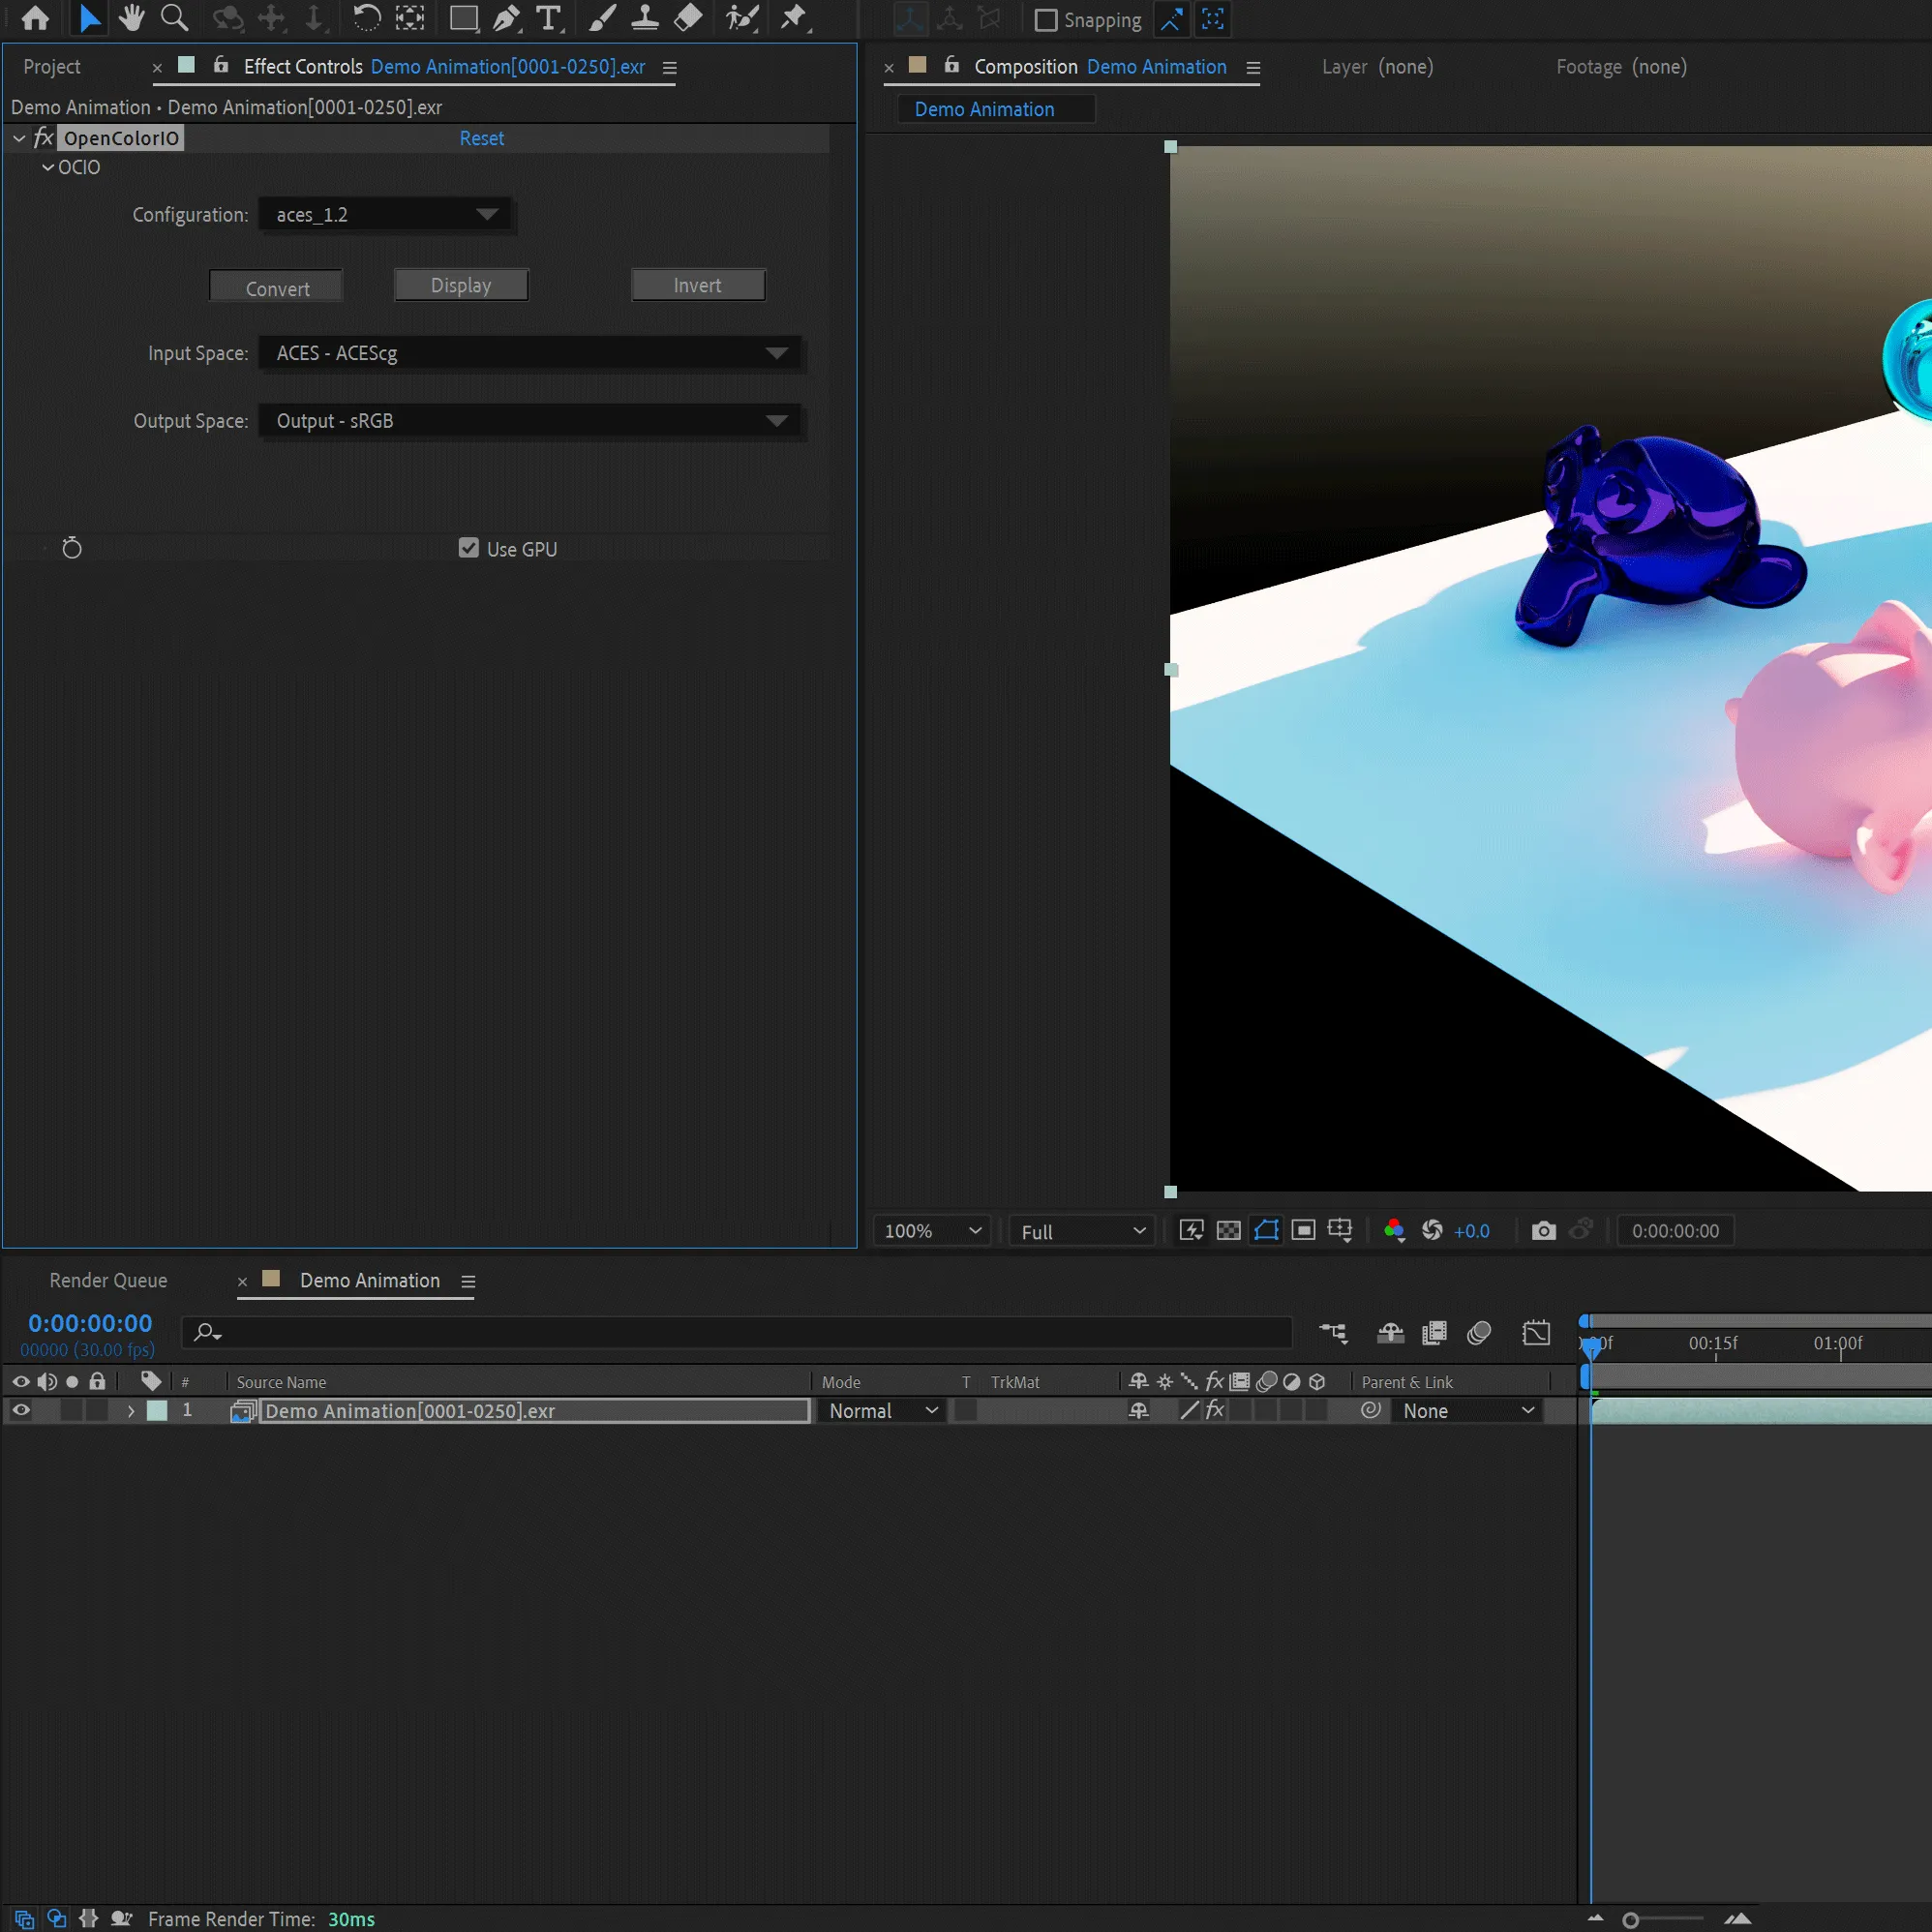
To switch the Color space from Linear RGB to RGB, to get an useable Image you need to add the OpenColorIO Effect, which is a free Plug-in. That allows you to switch the Color space of your Footage.
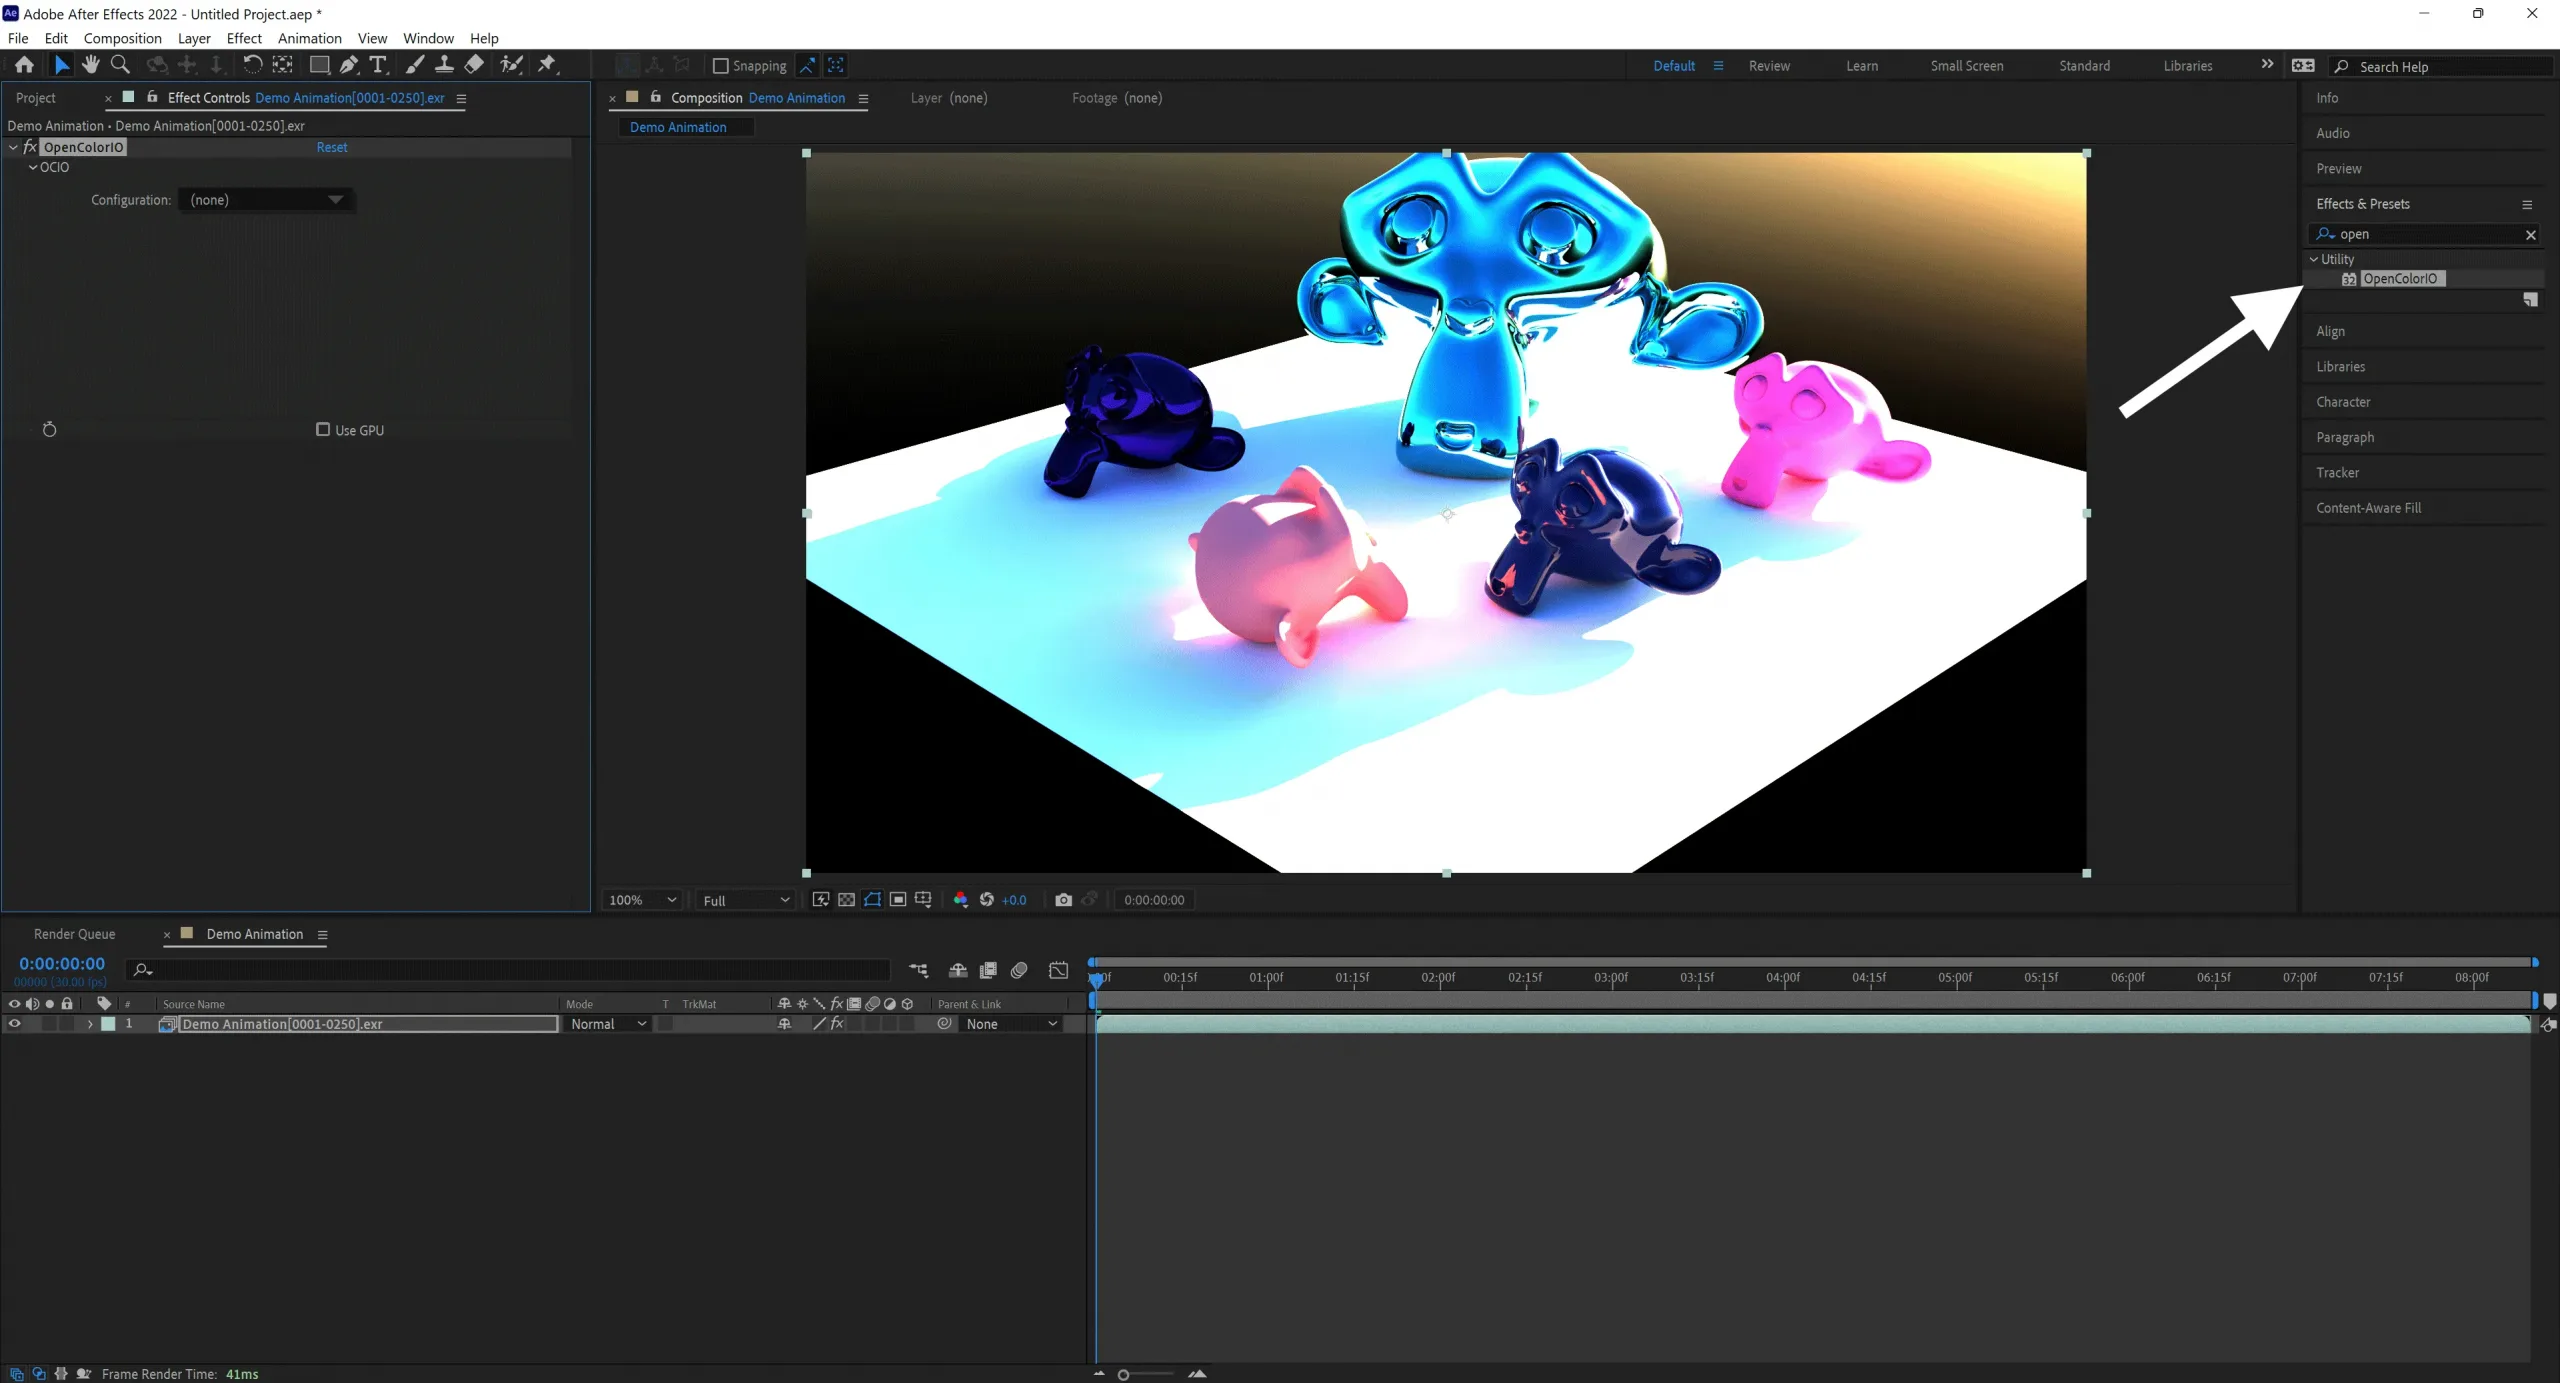
As input space pick ACEScg. And as output, pick RGB.
Step 10. Export the Video
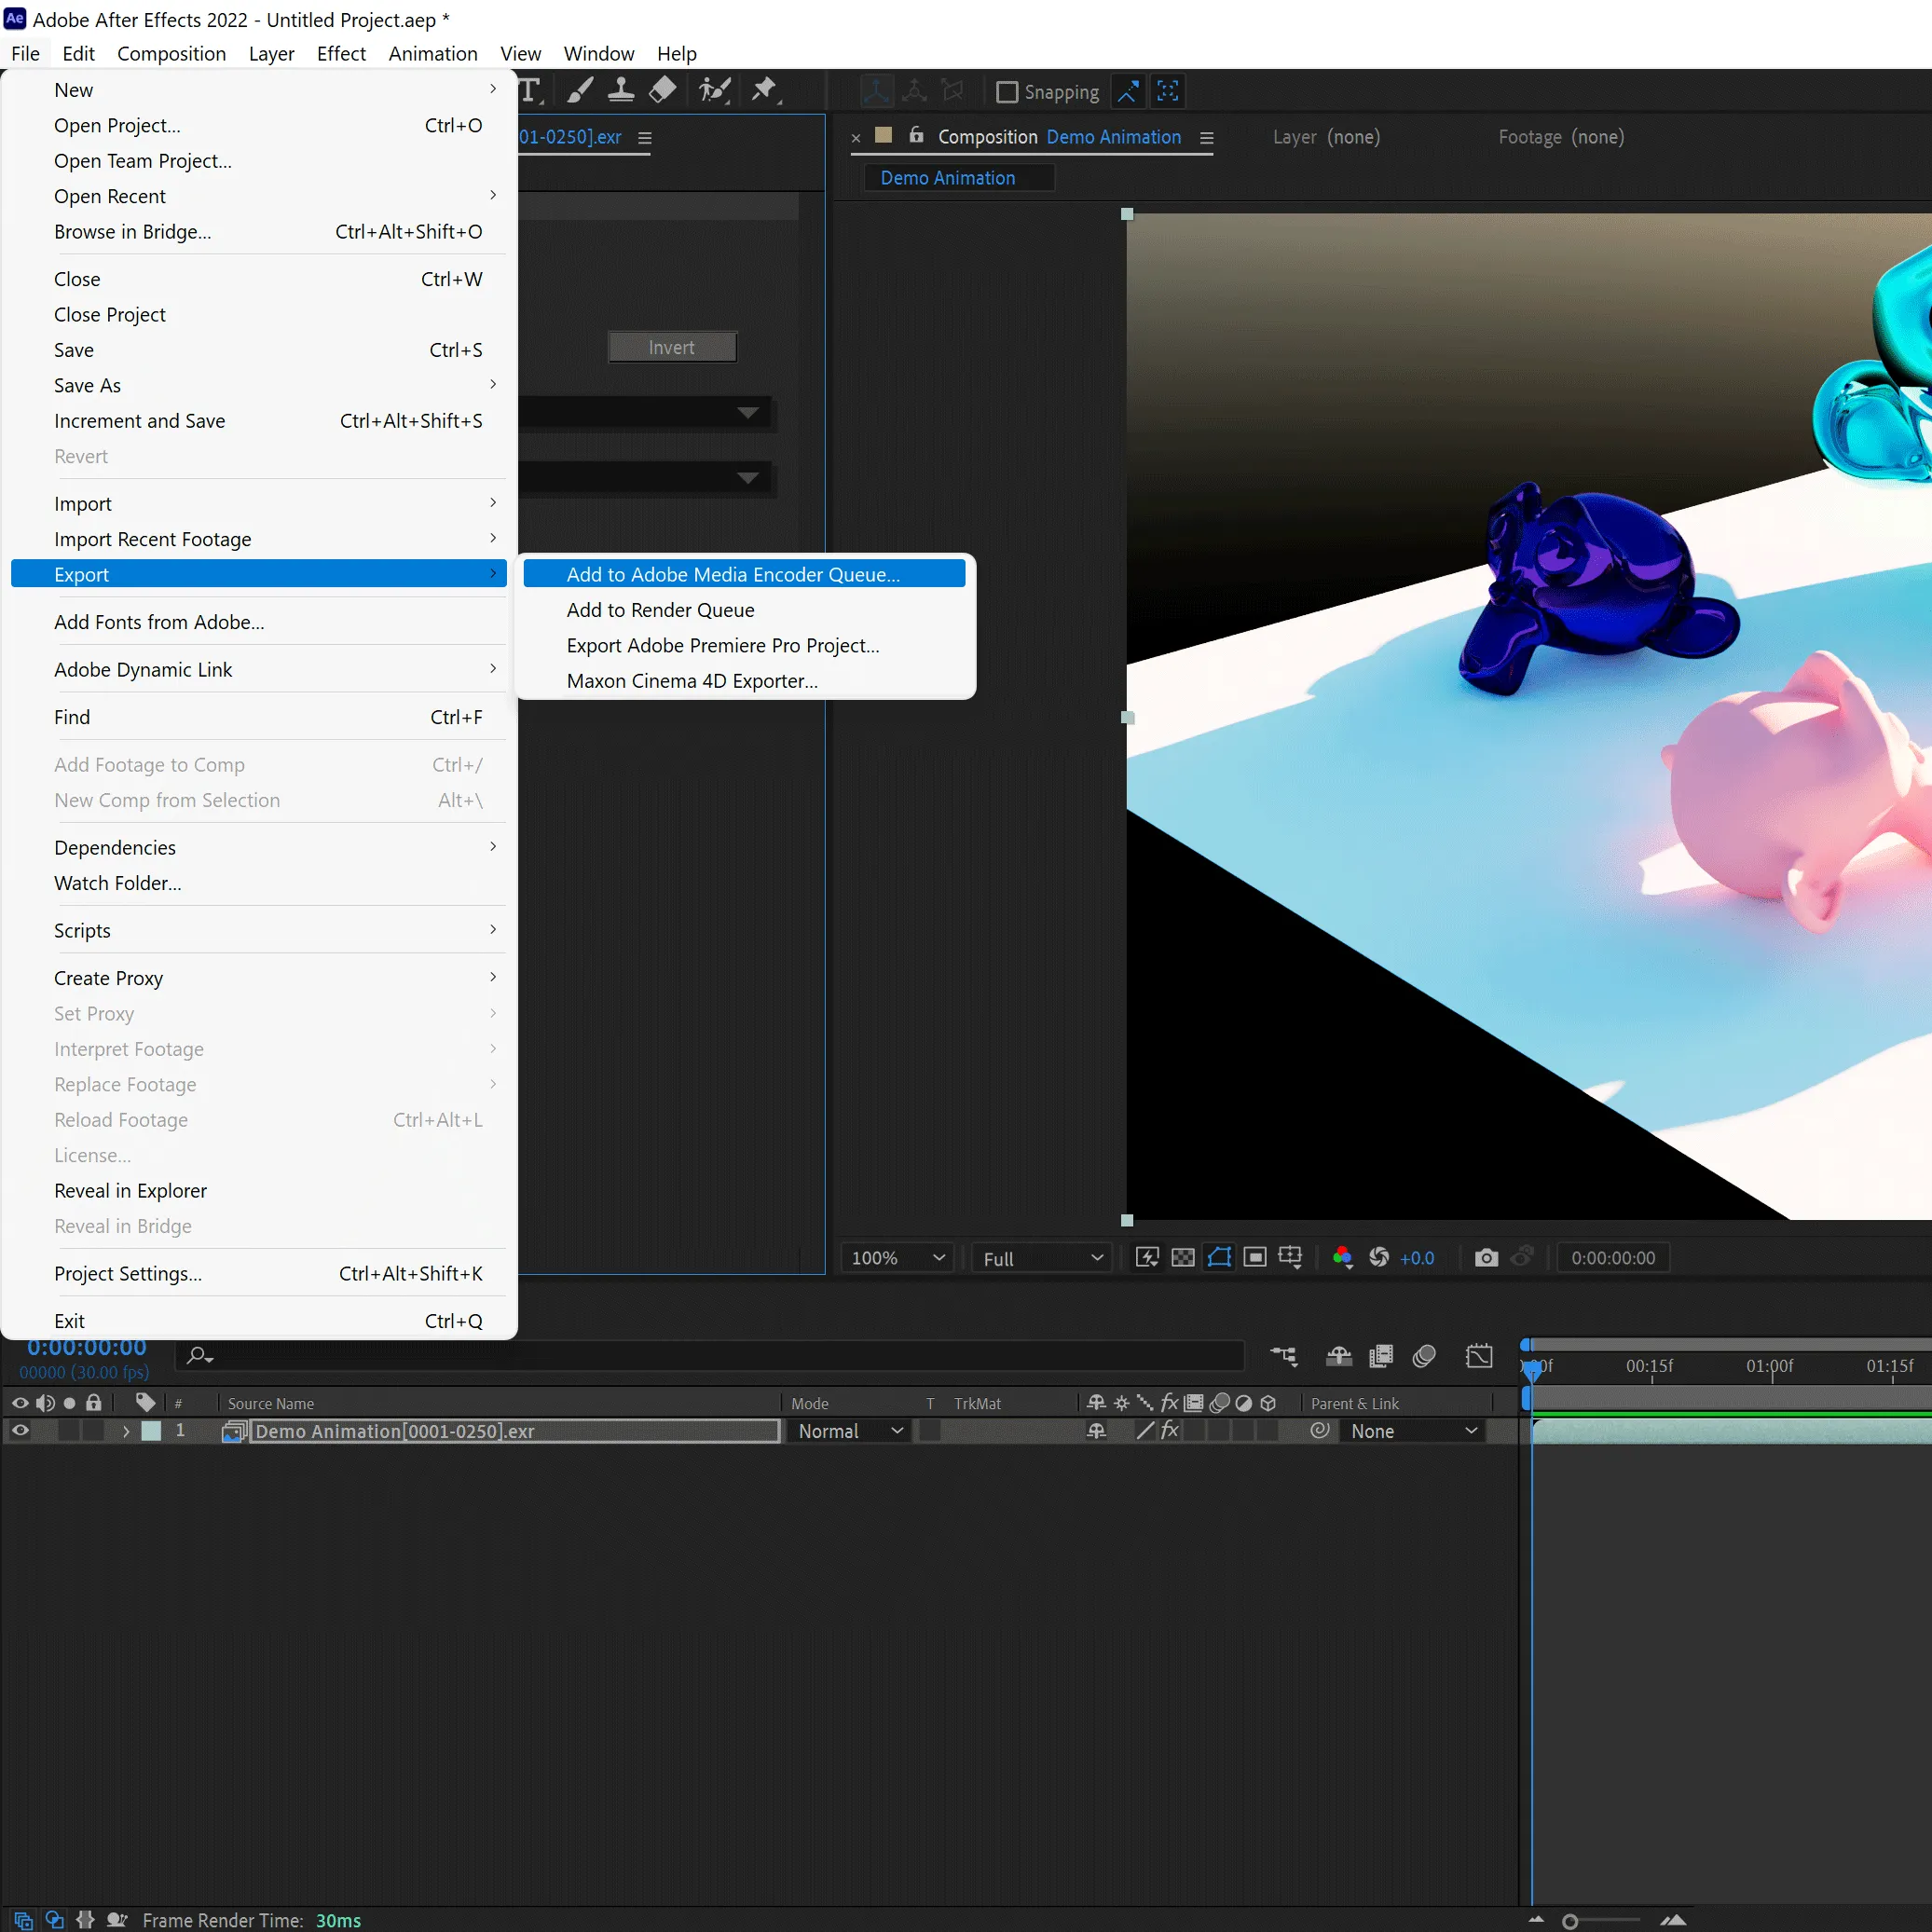
Select the Timeline and click on File > Export > Add to Adobe Media Queue.
After That, Adobe Media Coder (If Installed) opens up and the project will appear (both can take a while).

Click on the Blue text in the Preset Column. To get to the Export Settings.
As Format, H.264 is the best all-rounder which work for every application.
Under Output Name: You can set where you want to save the final Video.
There are a lot of things you can set, but that would completely break the mold completely.
If you finished the Settings, Click on OK and press the green Play button.



Thanks for the tutorial
That is true. I usually convert the single PNGs into a QuickTime video after the project is done.